
You know database. We are using those for storing our WordPress websites data like users, posts, pages, and other related important things. If you are installing WordPress manually, you may want to create a MySQL database and user account manually. In this post, we are going to show you how can you create a database using cPanel.
How To Create a Database Using cPanel
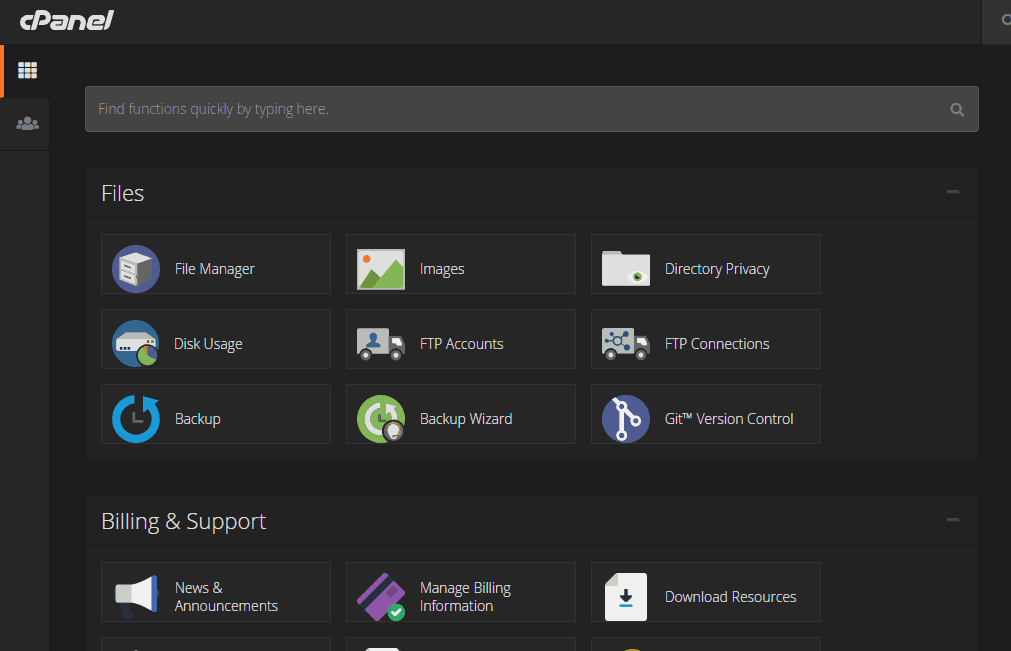
First of all, log in to your website’s cPanel.
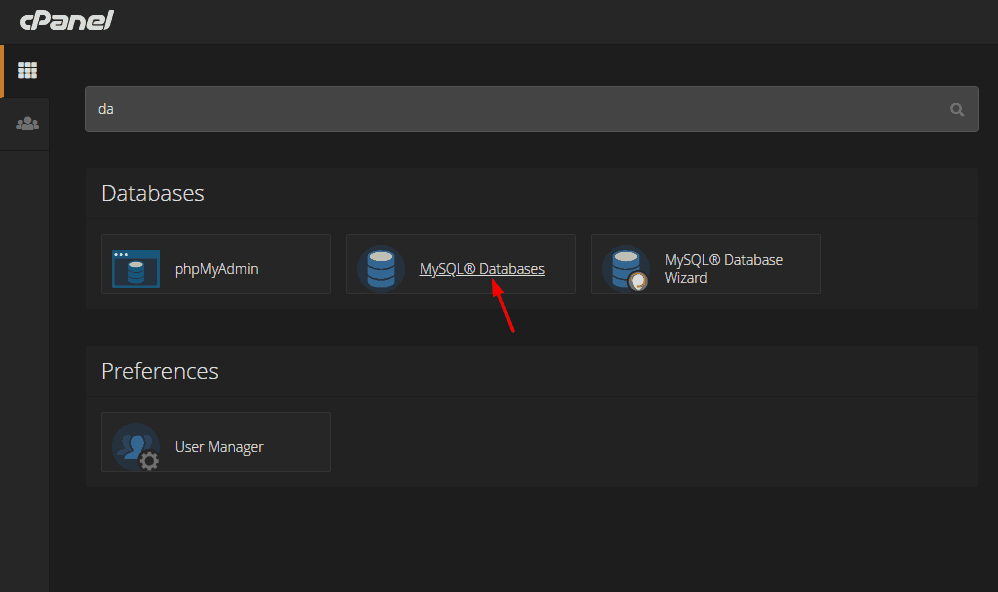
Now go to the MySQL databases section.
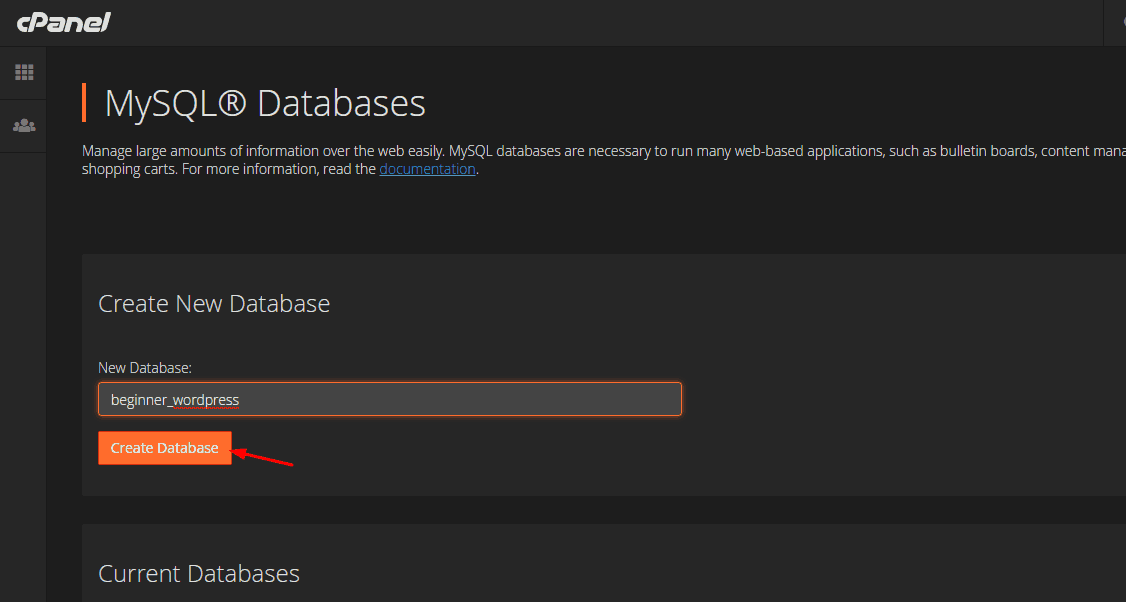
Enter a database name and click on create the database.
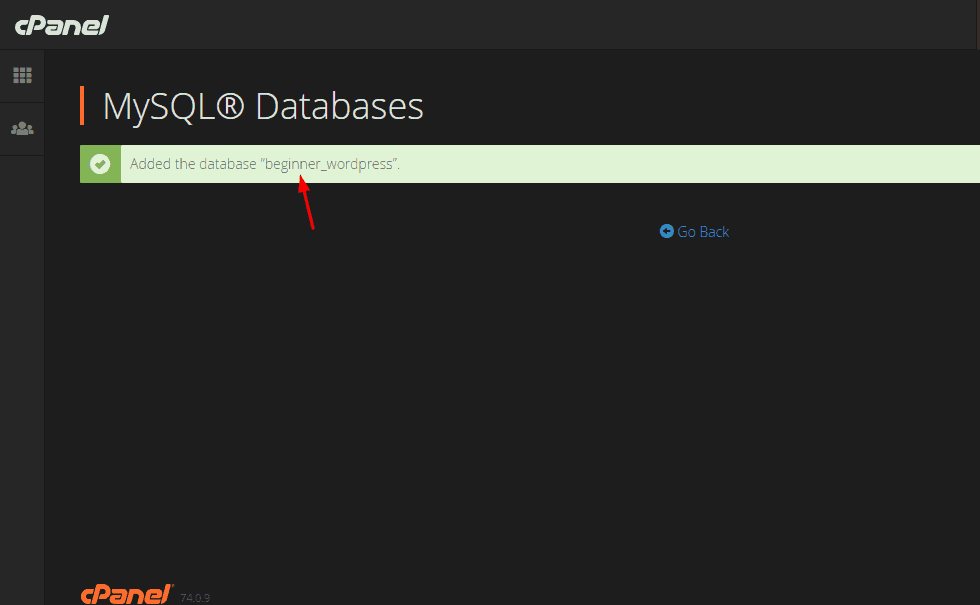
Your server will create a new database for you.
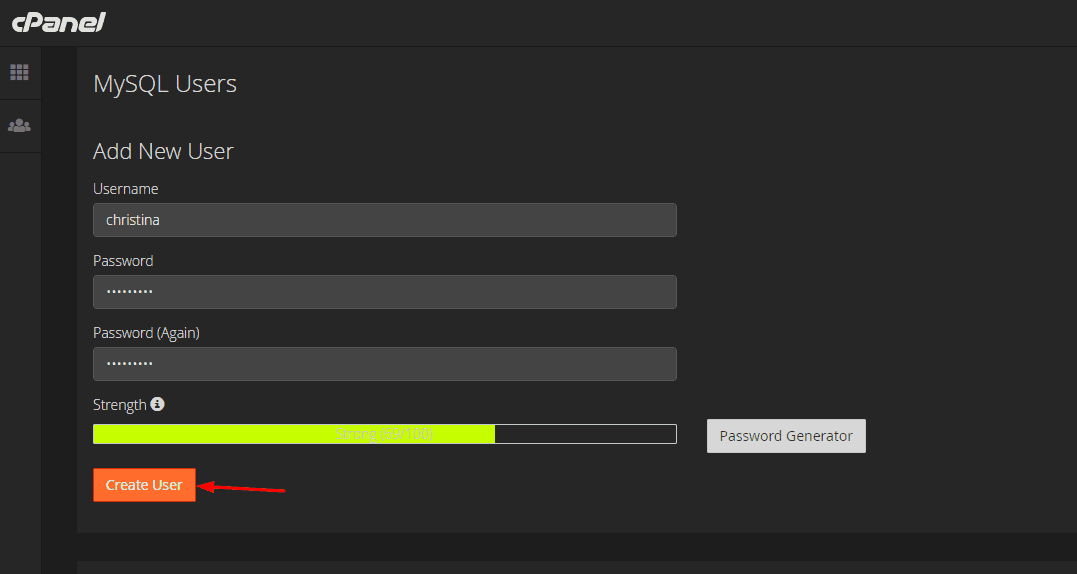
So we have successfully created a database. All we need now is, create a user and assign the user for the database. Go to the bottom page. There, you can see a section for creating a user. Enter your username, user password and create the user.
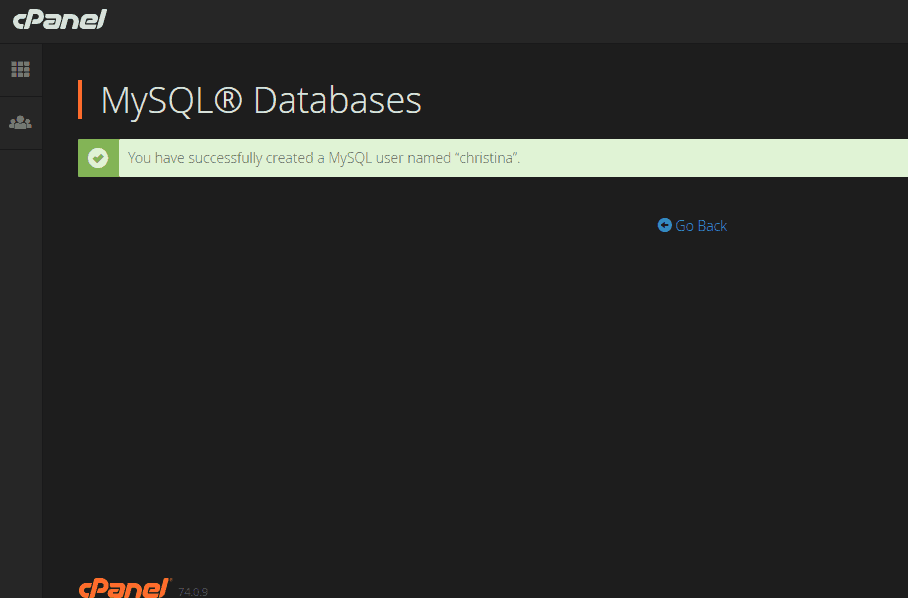
Successfully created the user!
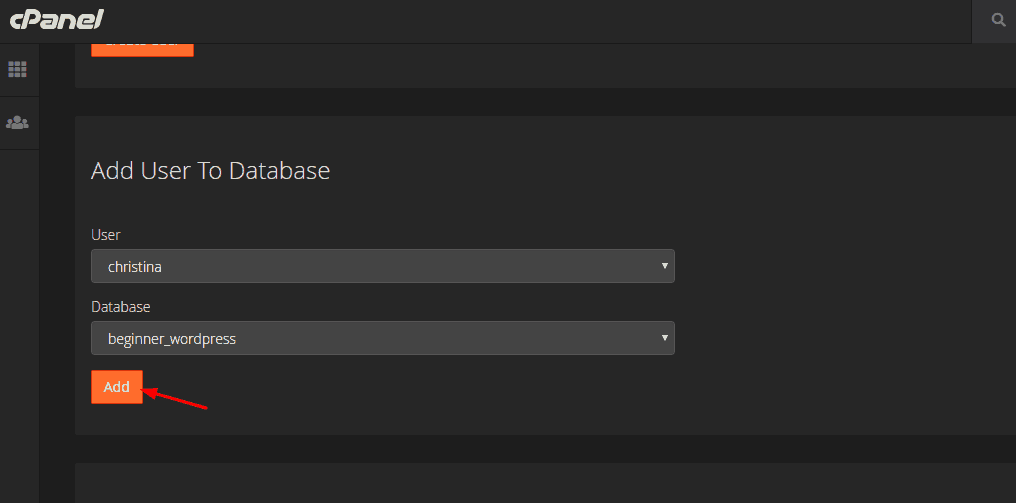
Now comes the main part. We have created a database and a user. Now, add the user to the database.
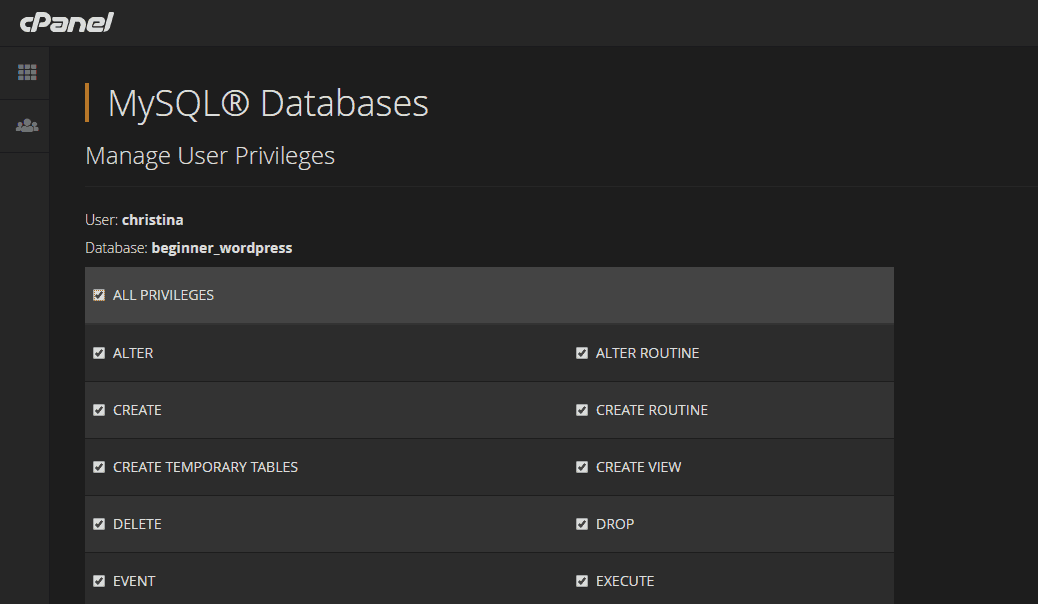
You will need to choose the privileges. Select all of them and update the settings.
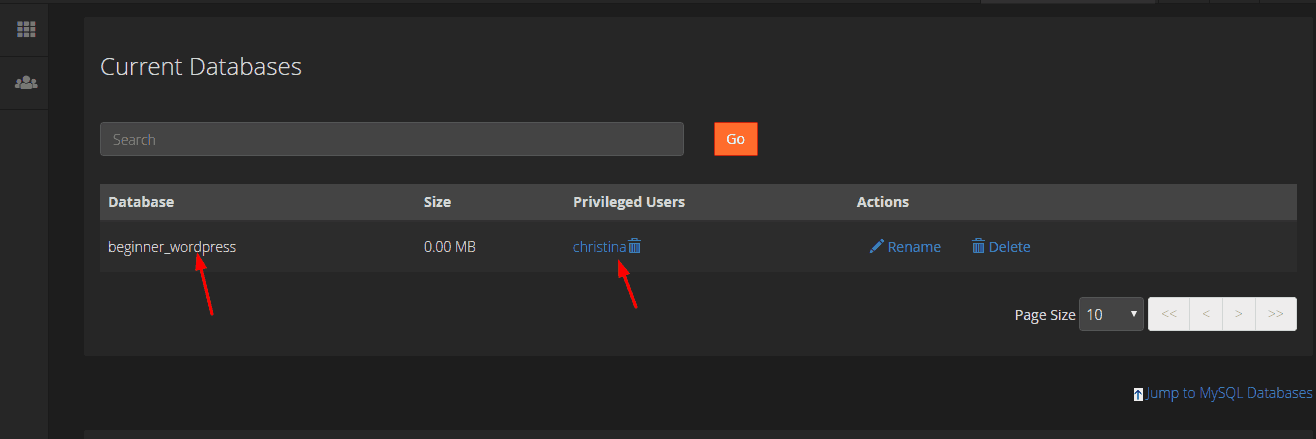
You can see the user is assigned to your newly created database.
You can use this database for storing your website data.
If you are still having trouble, you can contact your web hosting company. They will probably help you to do it.
We hope you found this post useful and enjoyed the read. If you did, please consider sharing this post with your friends and fellow bloggers on social media. For more interesting guides and product reviews, check out our blog section.
If you need to create an FTP account, check out our guide on how to create an FTP account in cPanel.
Leave a Reply