We highly prefer using buttons on CTA (Call To Action) widgets and inside posts. It will be more catchy, and user-friendly. In short, far better than a text link. Well, if you know a bit about CSS and HTML, you could create your own CSS buttons and add it inside your blog.
Not all our users are pros and most of them are beginners. For those who don’t know how to code, this post would be helpful. In this post, we are going to show you how to create custom CSS Buttons for WordPress blog and add it inside posts!
Create Custom CSS Buttons For WordPress Blog
Without wasting time, let’s move to the tutorial.
First of all, go to CSS3 Button Generator.

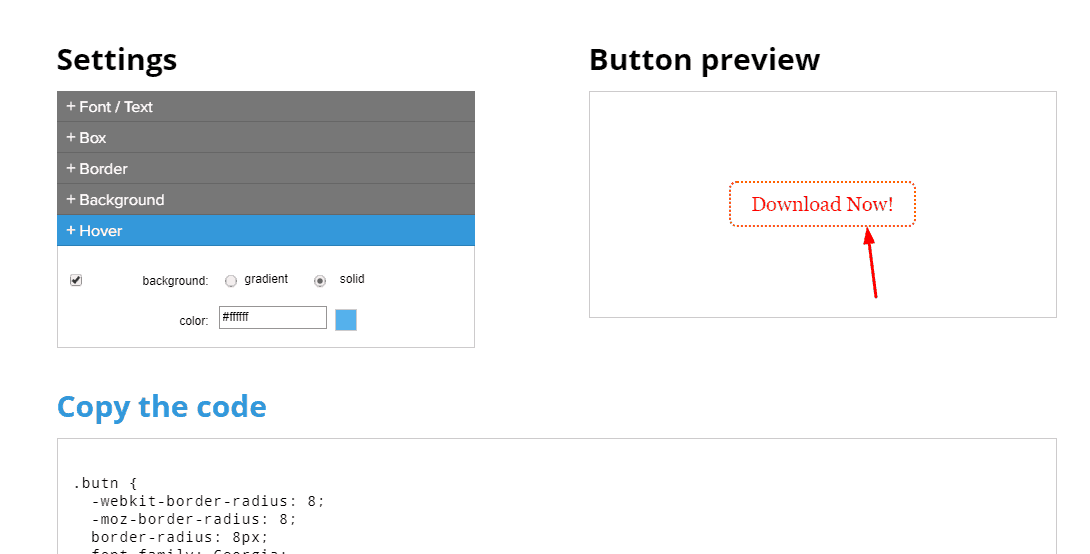
On the left side, you can customize your button. The right side will show the live preview of your button.

Start customizing your button. From there, you can customize
- Font/ Text.
- Box.
- Border.
- Background.
- Hover Effects.
So start customizing them.

Once you are done customizing your button, you can see some CSS codes on the page.

You need to copy the code. In our case, the code is something like this
.butn {
  -webkit-border-radius: 8;
  -moz-border-radius: 8;
  border-radius: 8px;
  font-family: Georgia;
  color: #ff0000;
  font-size: 20px;
  background: #ffffff;
  padding: 10px 20px 10px 20px;
  border: dotted #ff6200 2px;
  text-decoration: none;
}

.butn:hover {
  background: #ffffff;
  text-decoration: none;
}
Adding CSS Button CSS In WordPress
After copying the CSS, go to your theme’s style.css file and paste it. Or, you can use the customizer and additional CSS feature. In our case, we are going to use the customizer. Once you got pasted the code, simply publish the updates.

The CSS part is done.
You can see my button’s class is .butn. We need this when we want to show the button inside posts or wherever inside the blog.
Showing CSS Buttons In WordPress Posts
Now, you need to use this CSS class on your links for showing the button. This can be done through your WordPress theme editor. If you are using the WordPress 5.0, the Gutenberg editor, you can disable Gutenberg using the classic editor and bring up the old editor.
Go to a post which you have published. I will take the default WordPress post. You might see the visual editor. You need to shift to the text editor.

After doing that, copy the below code, paste it on the editor. You need to change the class according to your own.
<div><center><a class="butn" href="https://awpguide.com/blog/">Button</a></center></div>
Paste it using the text editor. This would be like

We have added alignment of the button to the center. If you don’t want it, remove the <center> and </center> code from there.
Then you can shift to the visual editor. After completing the post, simply update it.

Now, check the post from the front end.

Pretty simple isn’t it? By this method, you can show the button inside your posts, pages or custom post types.
We are doing it the same way with some custom codes. if you need to specify some custom fonts for your button CSS, use the font-family CSS. The button already has the font-family mentioned. You need to clear it and add your own.
Something like this. Make sure that you have added the Google font to WordPress.
.butn {
font-family: 'Work Sans', sans-serif; }
CSS Button Not Showing
If you are not seeing your CSS button, it might be an issue with your cache. Try to open the URL in an incognito window or test from a different browser.
Also, make sure that you have added the proper class on the HTML code and pasted the CSS correctly. If you are using any caching plugins like WP Rocket, WP Super Cache or WP Fastest Cache, clear the cache and try again. This will work.
We hope you found this post helpful and enjoyed the read. If you did, please consider sharing this post with your friends and fellow bloggers. For more related posts, you need to see our blog section.
If you want to edit your blog’s CSS without writing a single line of code, we will recommend you a dedicated styling plugin called CSS Hero. Our CSS Hero coupon will help you to get 30% discount on the purchase.
Leave a Reply