
Are you planning to integrate WPForms with Salesforce? By doing it, you will be able to save a lot of time of yours and invest it in your business. If you are using the WPForms plugin and need to integrate it with Salesforce, we have got you covered. In this article, we are going to show you how you can do it in just 5 minutes.
WPForms
WPForms is a freemium WordPress form builder plugin available in the market. With it, we will be able to create simple contact forms, lead generation forms, donation forms, payment forms, or anything we wanted. There’s a free version available (WPForms Lite) with limited features and support.
The premium WPForms plugin comes with features like:
- Form Templates.
- File Uploads.
- PayPal Integration.
- Stripe Integration.
- Conditional Logic.
- User Registration.
- Spam Protection.
- Form Locking.
- Zapier Integration.
Etc.
We have shared a WPForms review on our site and you can check it for more information.
WPForms Pricing
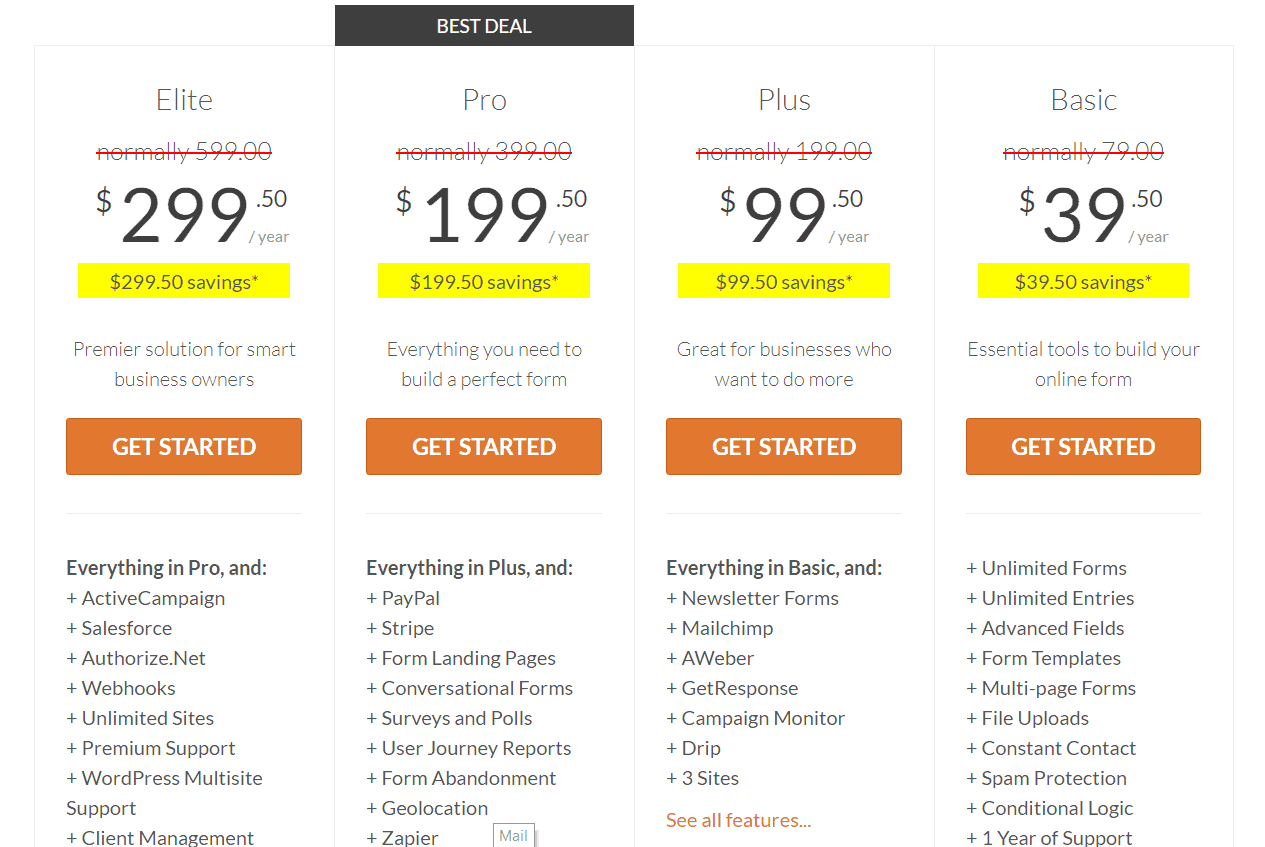
As of now, there are four premium pricing options are available.
- Basic – $39.50/ year.
- Plus – $99.50/ year.
- Pro – $199.50/ year.
- Elite – $299.50/ year.
They are offering a 14-days full refund. So, if you are not happy with the purchase, you can get your money back.
How To Integrate WPForms With Salesforce?
Now, let’s see how we can complete the integration and automatically send all the entries.
For the Salesforce add-on, you will need to purchase the WPForms Elite plan. After completing the payment, you can log in to your WPForms account, download the premium plugin file. After downloading it, log in to your WordPress blog, install and activate the premium version of WPForms there.
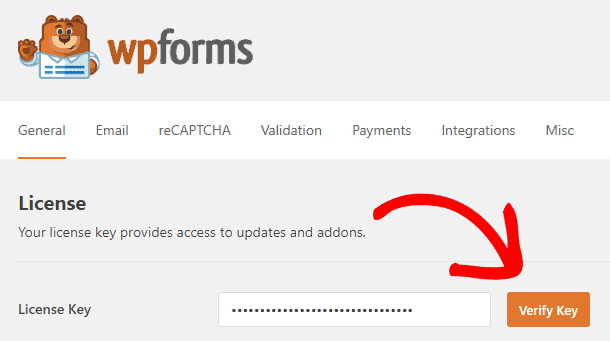
After activation, verify your license key.
Verifying your license key will help you to get premium support, updates, and access to their unique add-ons. Once you have done that, go to the WPForms add-ons section and install the Salesforce add-on on your blog.
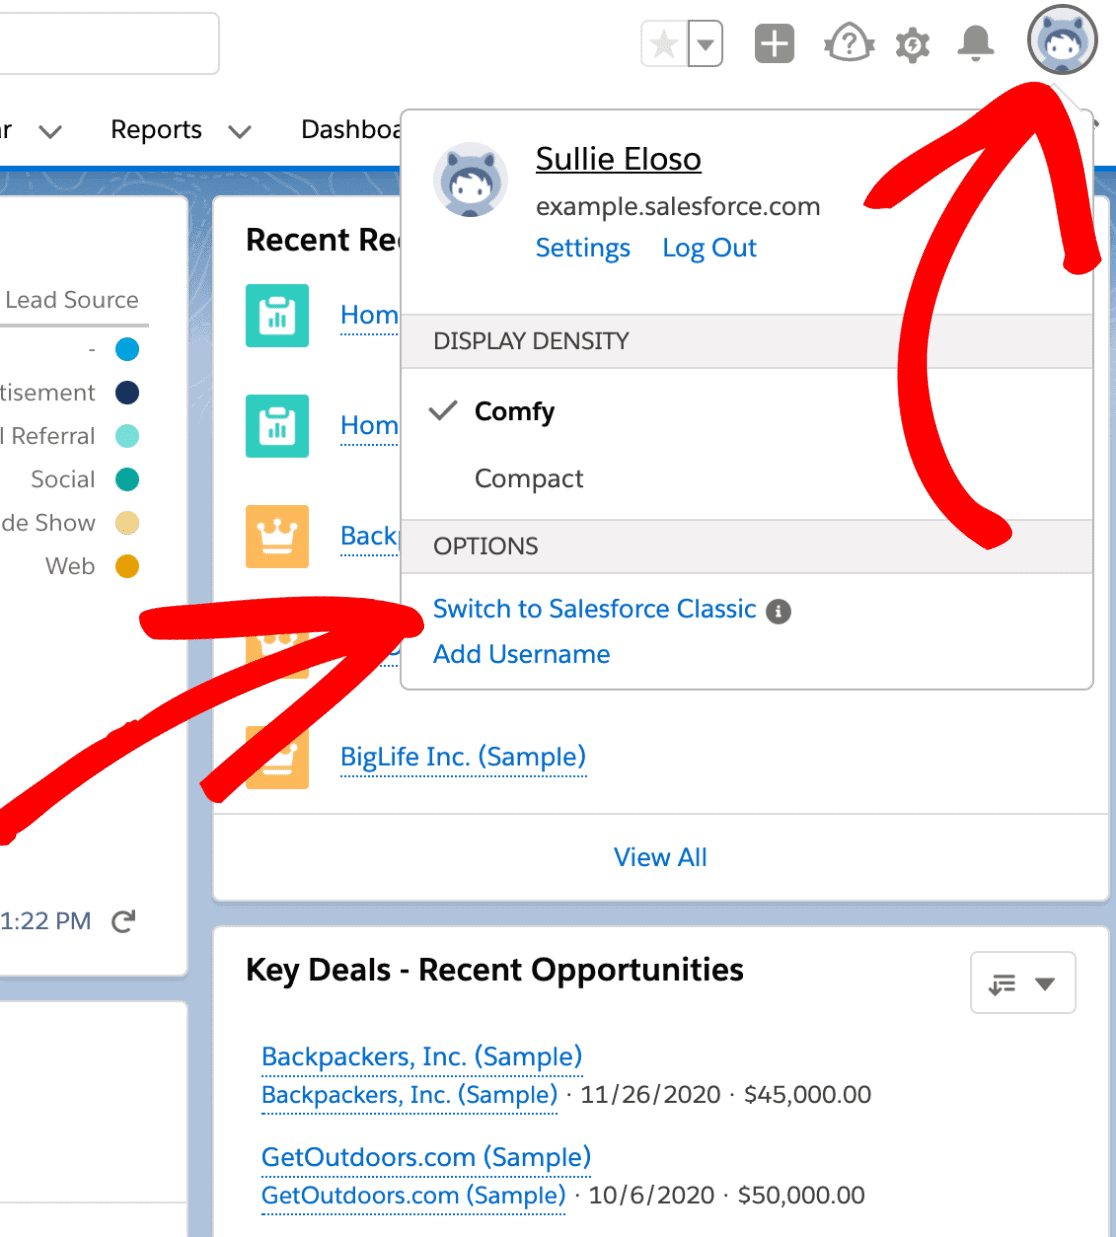
Now, we are good to go. The very next thing we need to do is, log in to Salesforce and switch it to Classic mode. You will see the option in your profile section.
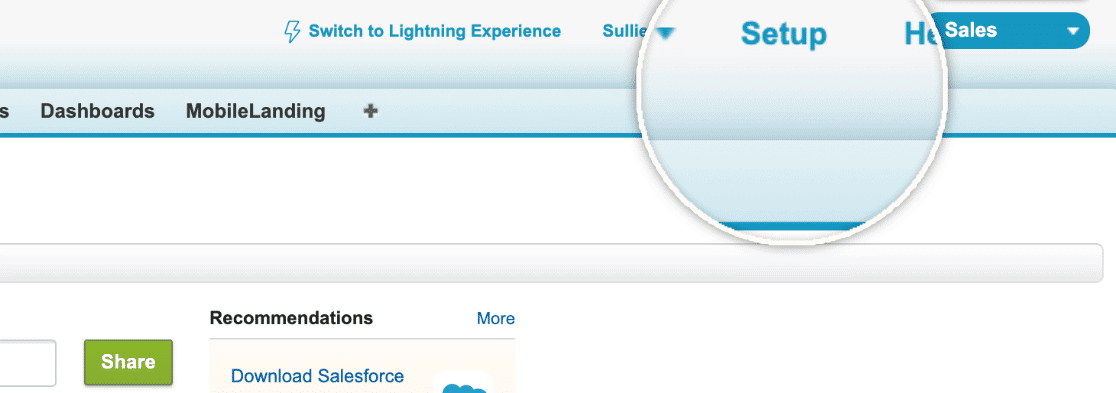
Within a few seconds, the site will show you the classic mode. Now, go to the setup. You will see it in the top bar.
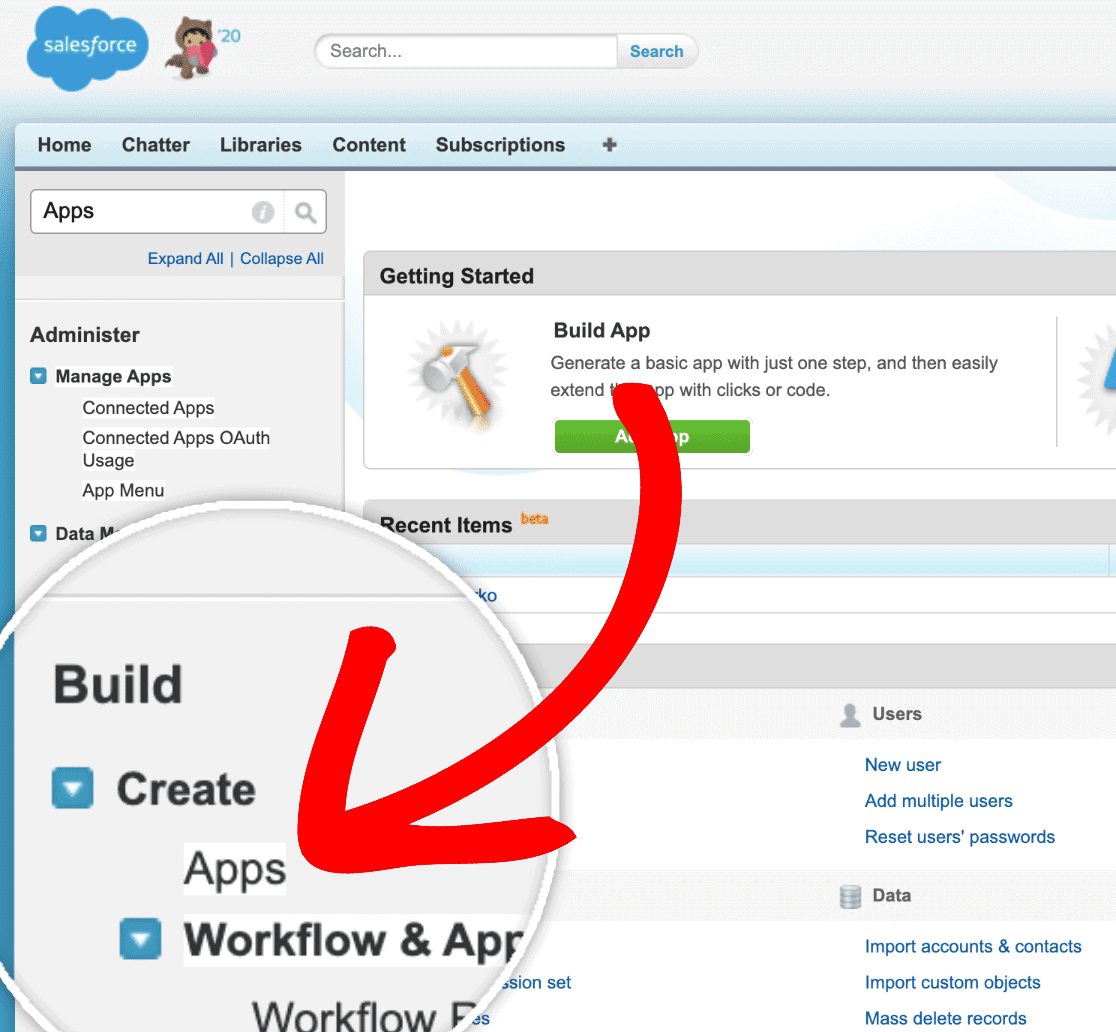
What we need to do now is, create an app. You will be able to use the search feature for filtering the options available. Just search for Apps and you will see the setting for building new apps.
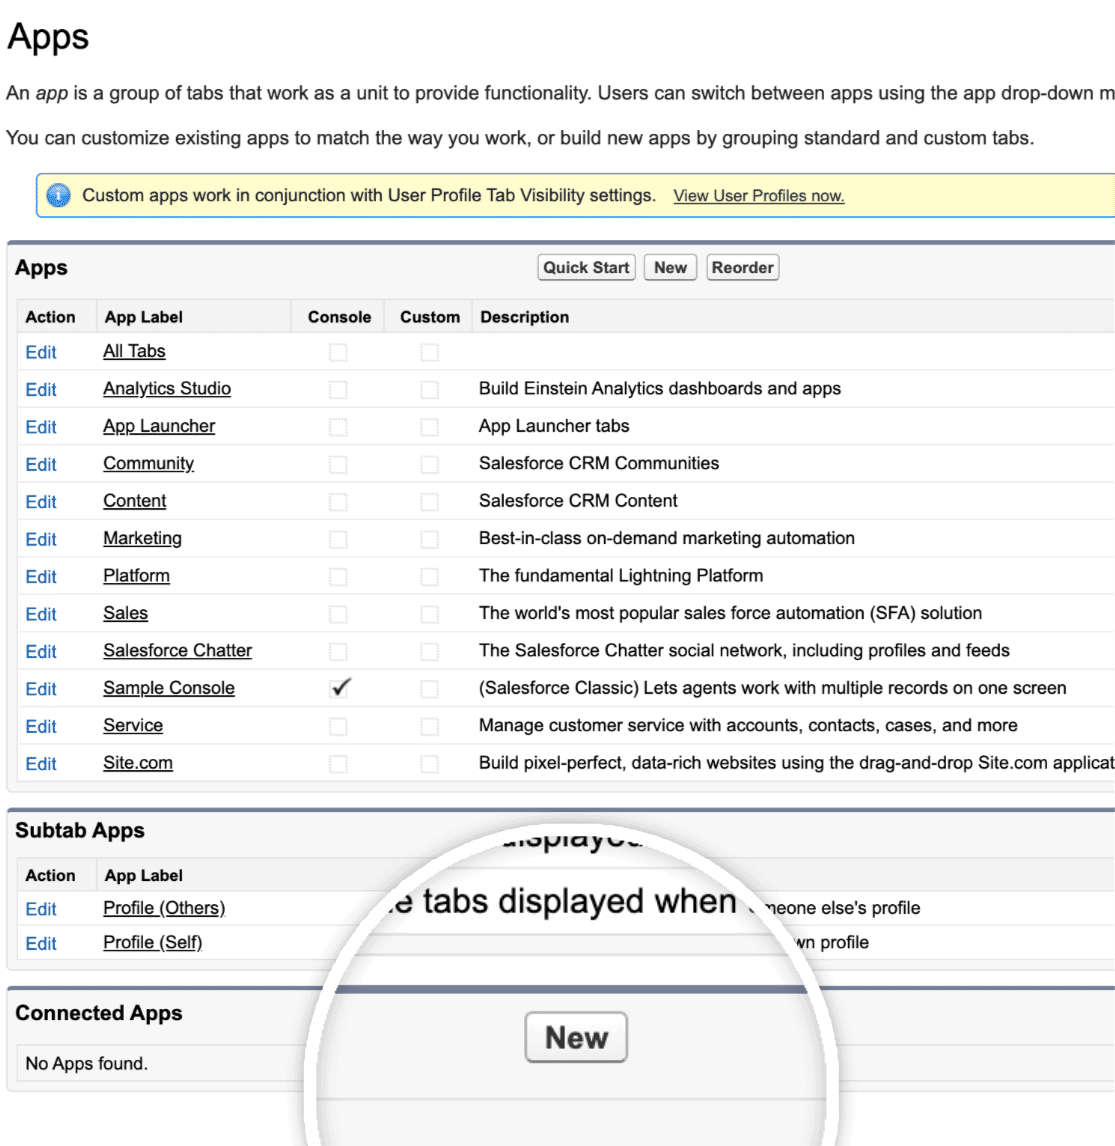
You will see so many apps linked with your Salesforce account there. Don’t edit any of those. What we need to do is, create a new app for our integration. In the bottom section, you will see an option for creating new apps.
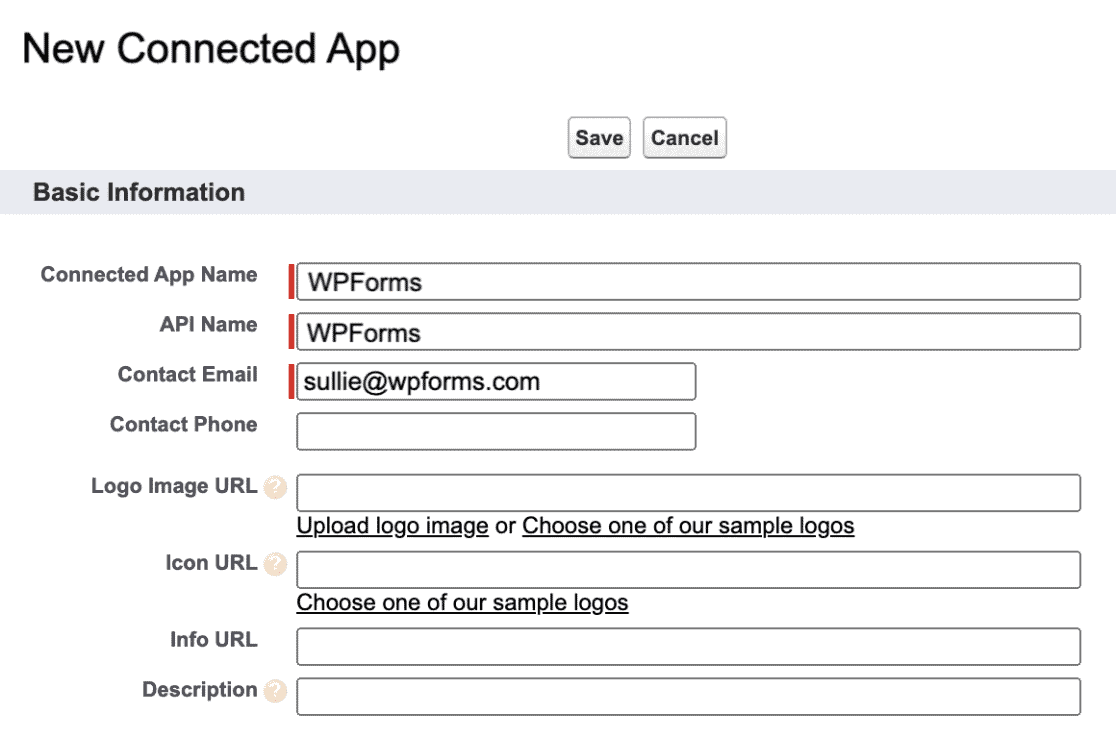
You will need to enter a name for your app, API name, and contact mail.
The name is just for identifying your app. This can be anything. The site will automatically fill the API name according to our app name. But if we need, we can edit it.
In the email field, enter your contact email.
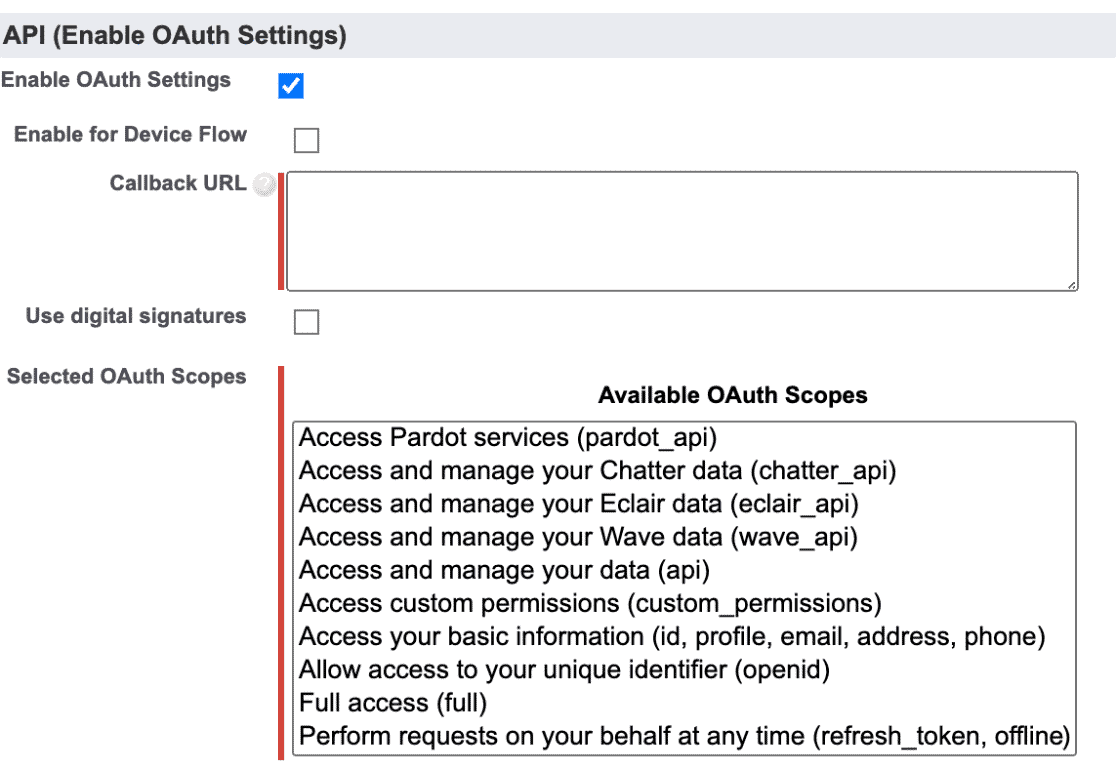
For configuring the app’s permissions, enable the OAuth settings.
After enabling the OAuth settings, the site will show you more related options.
The fields marked in red are important.
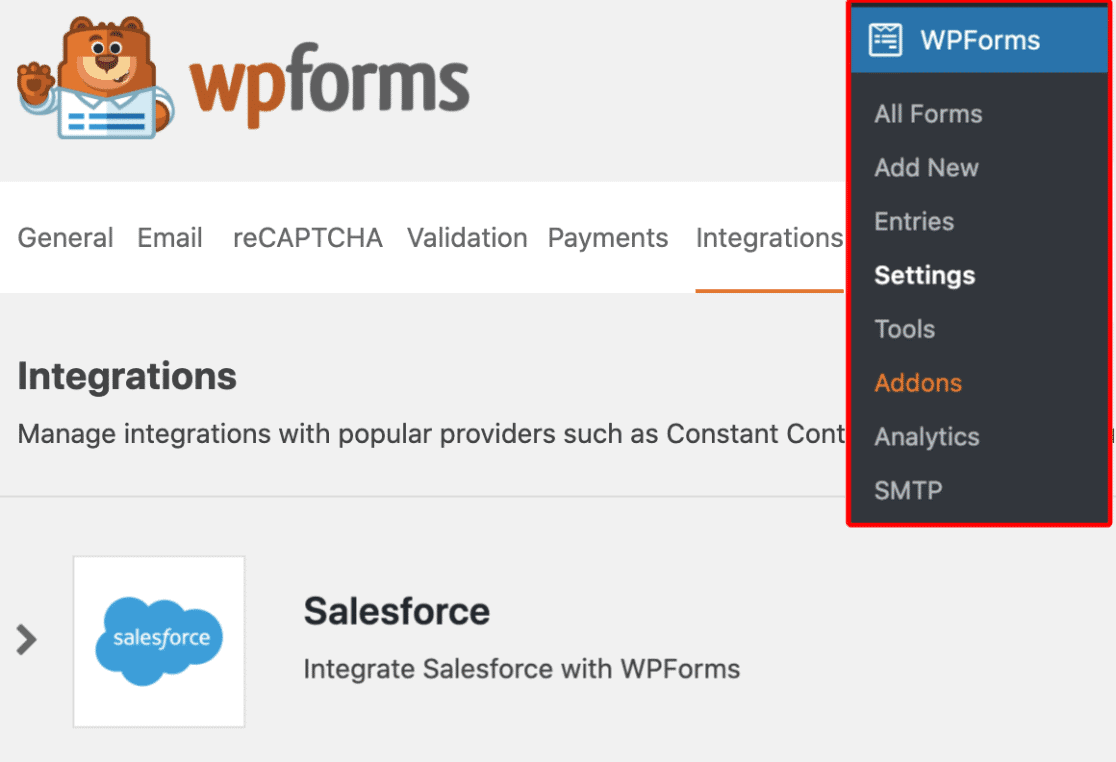
On your site, go to the WPForms settings. Under the integrations tab, you will see the Salesforce add-on.
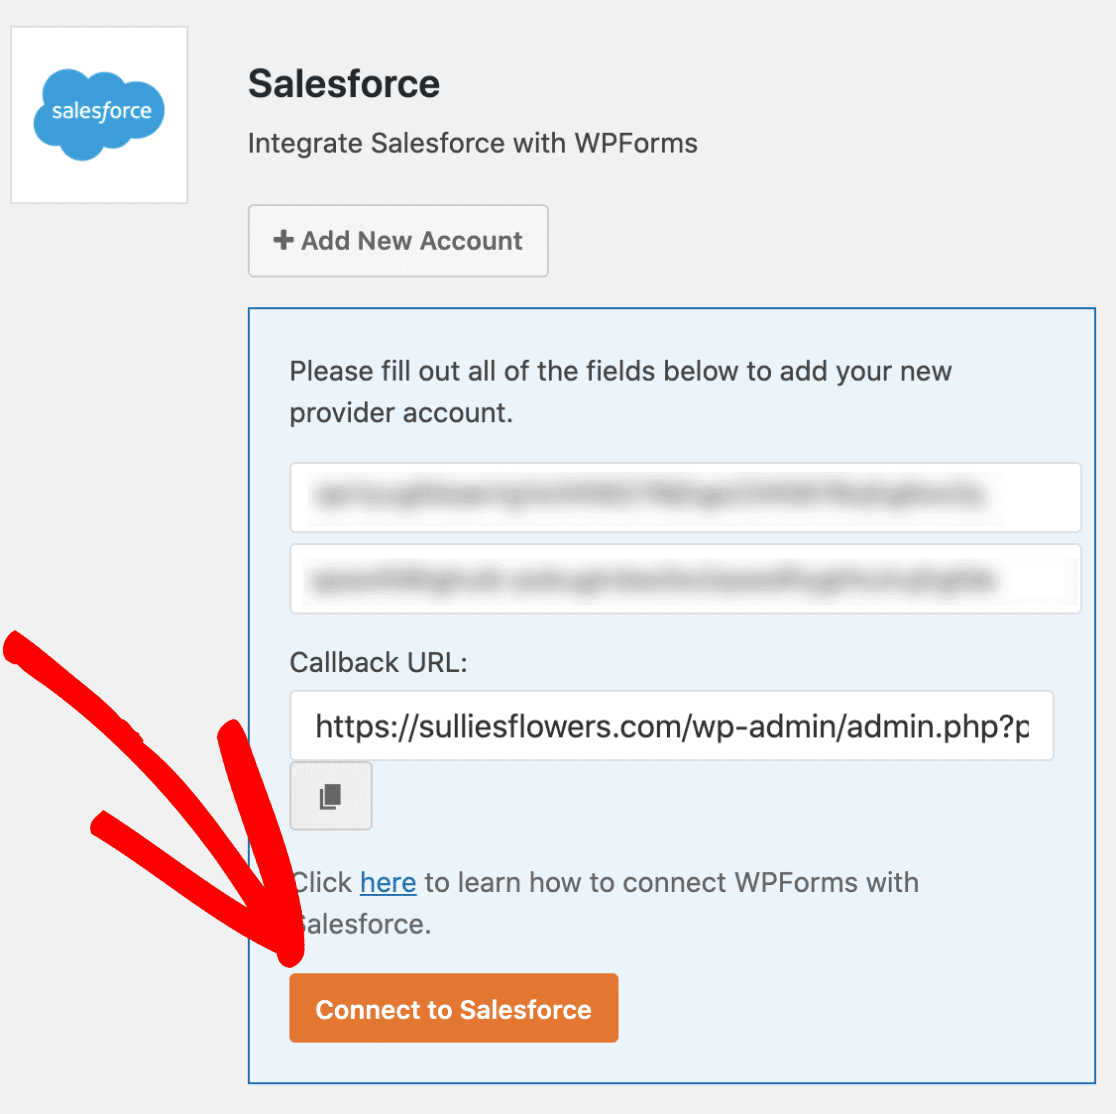
We have just installed and activated the add-on. We haven’t configured it yet. So, click on the add new account button.
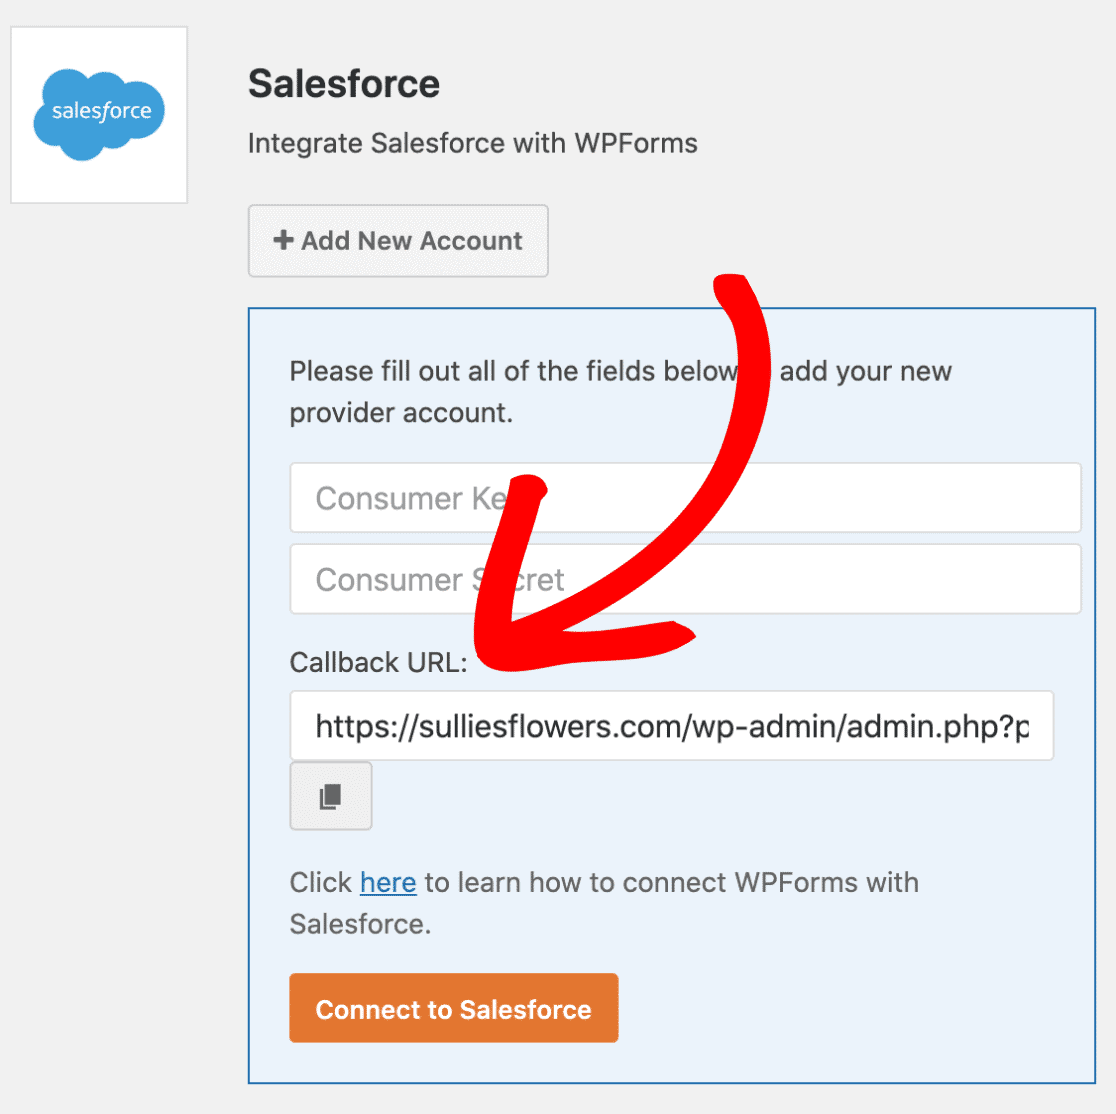
The plugin will show you a unique Callback URL for authentication.
You will need to dopy it, paste it into your Salesforce app settings.
We are ready to select the permissions we wanted. As of today, WPForms just requires two permissions from the list.
- Access and Manage Your Data.
- Perform Request On Your Behalf at Any Time.
After selecting these permissions, save your changes. You will need to wait for 2 to 10 minutes before using the newly created app. You will see a notice of the same in the next page load.
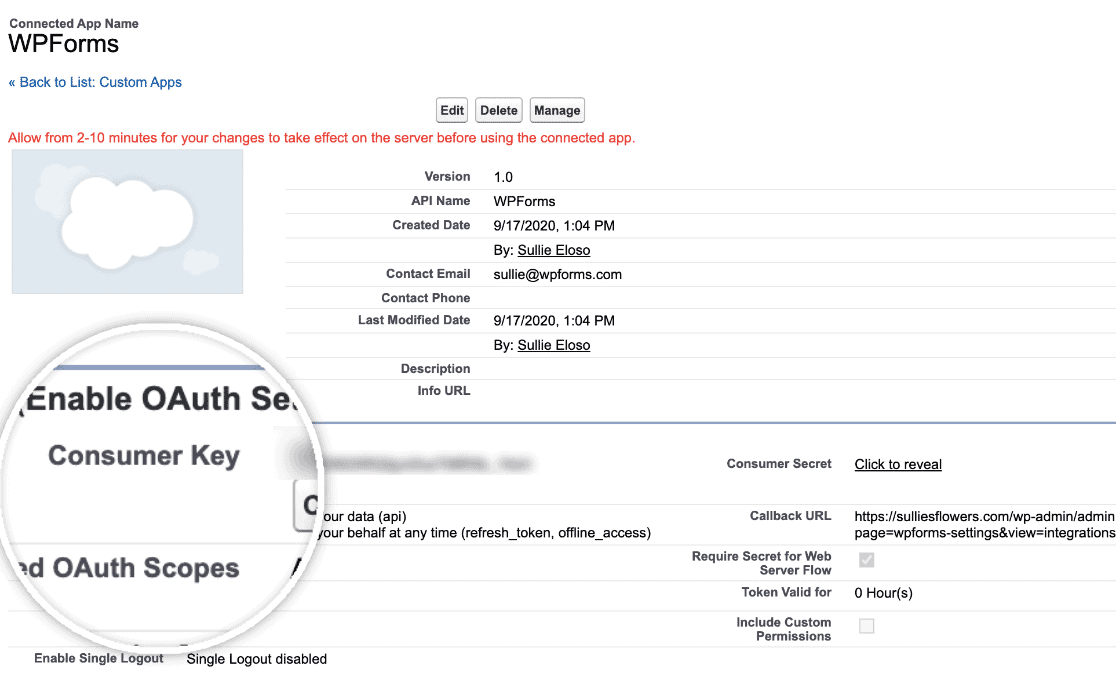
After waiting enough time, click on the Continue button. You will see your API information on the next screen. Copy the consumer key from the page.
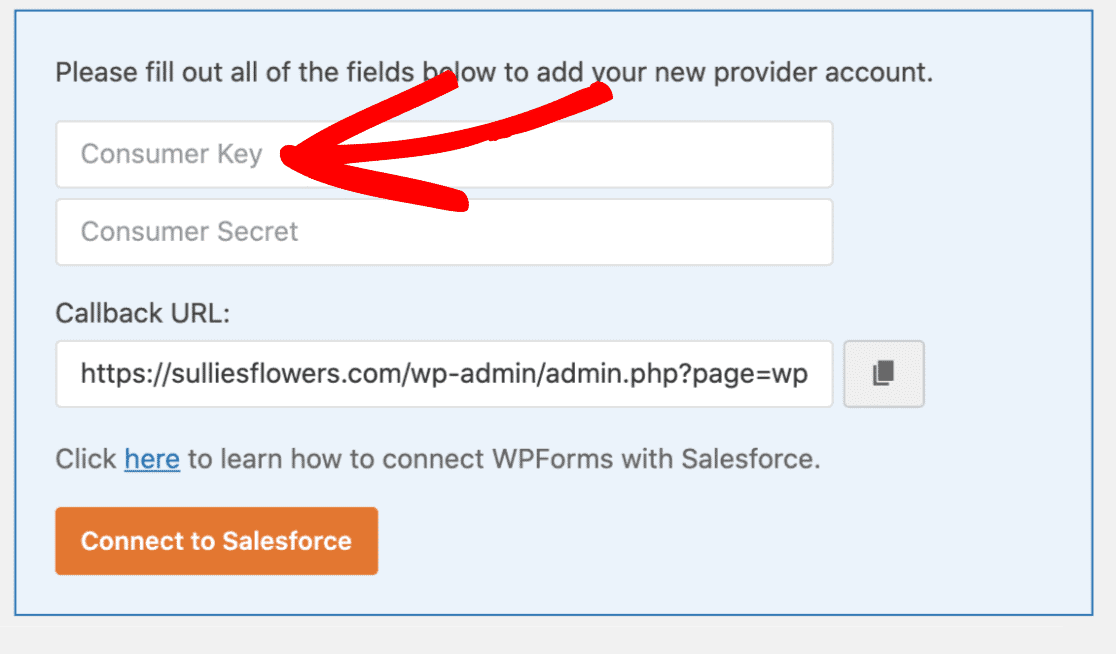
You will need to paste it to the WPForms Salesforce add-on settings.
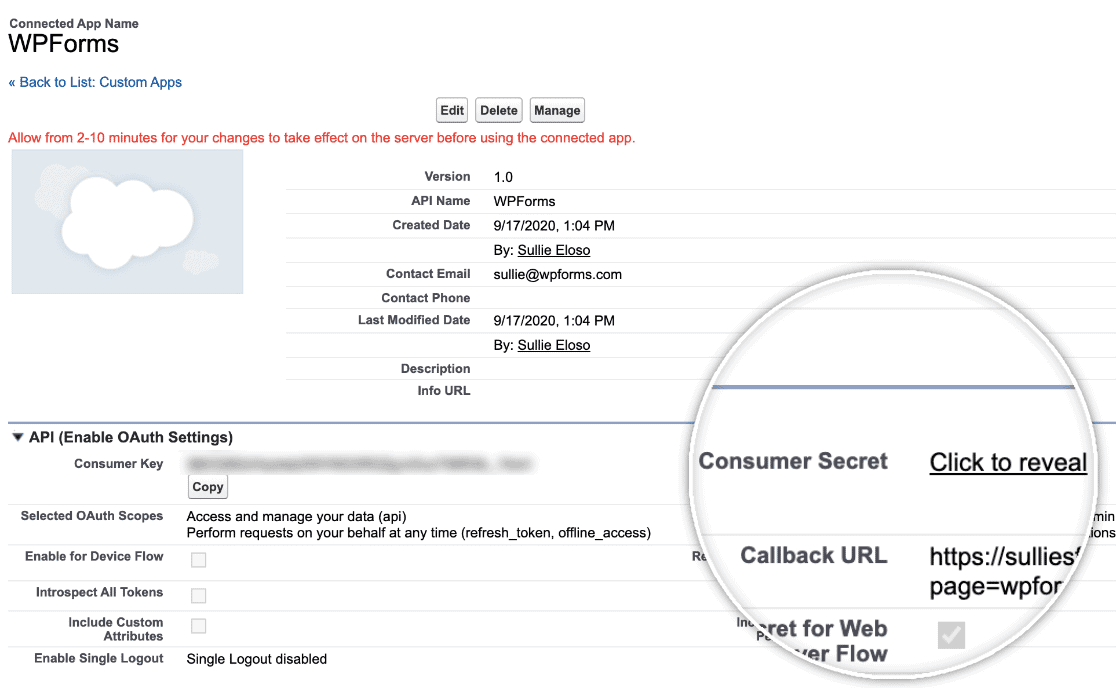
Just like earlier, copy the consumer secret from the API page.
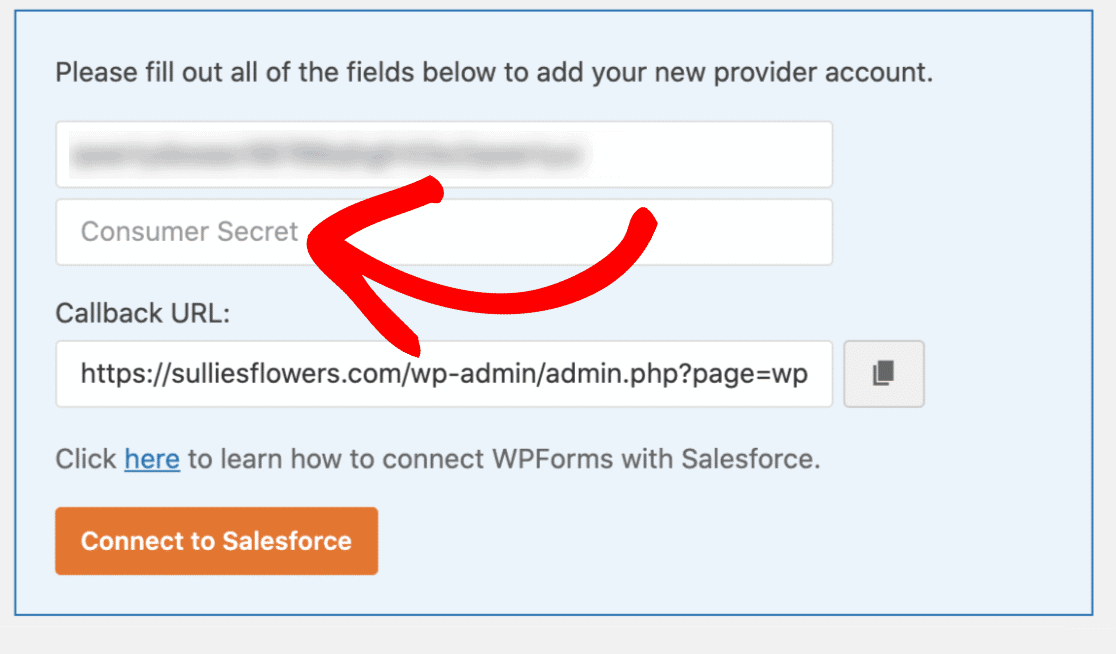
Paste the secret to WPForms settings.
After entering these credentials, click on the Connect To Salesforce button.
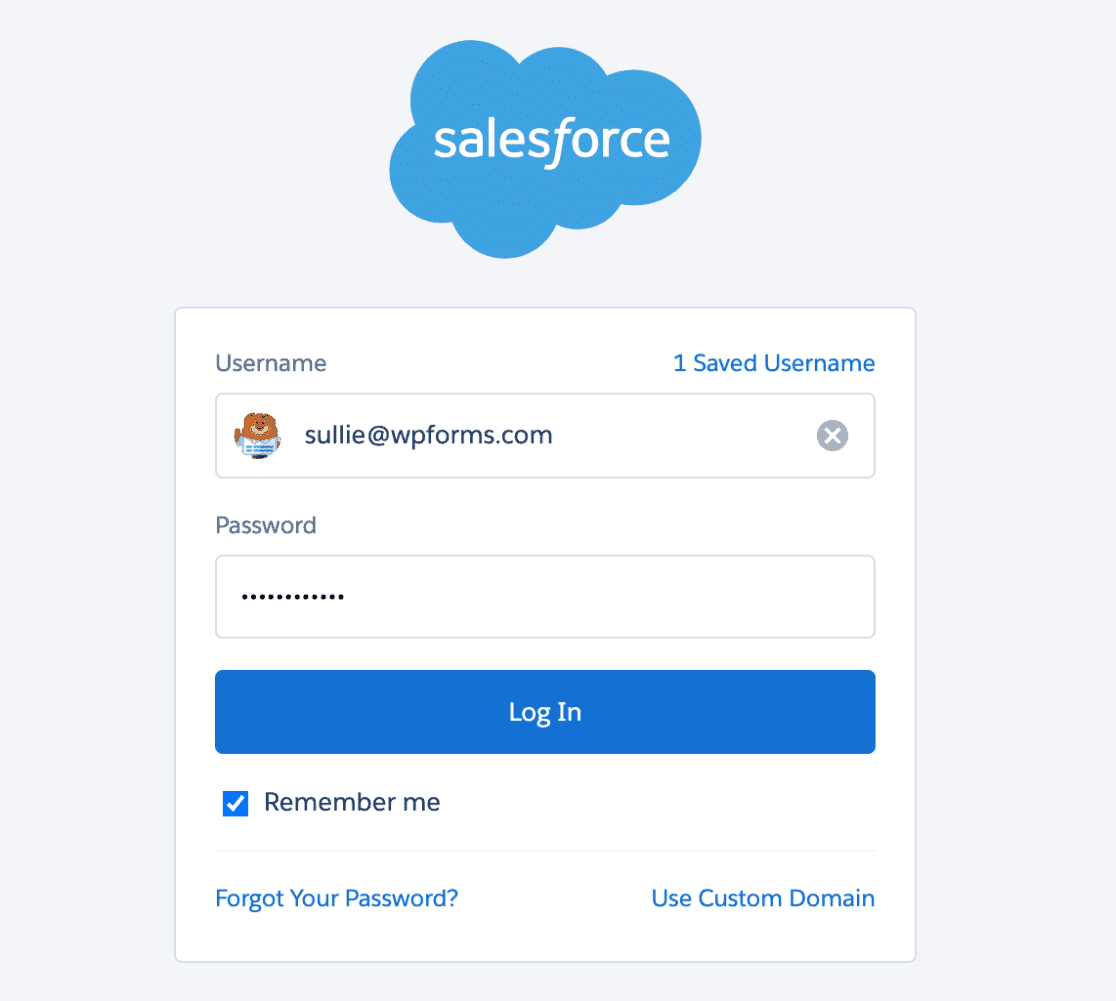
Log in to your Salesforce account for completing the connection.
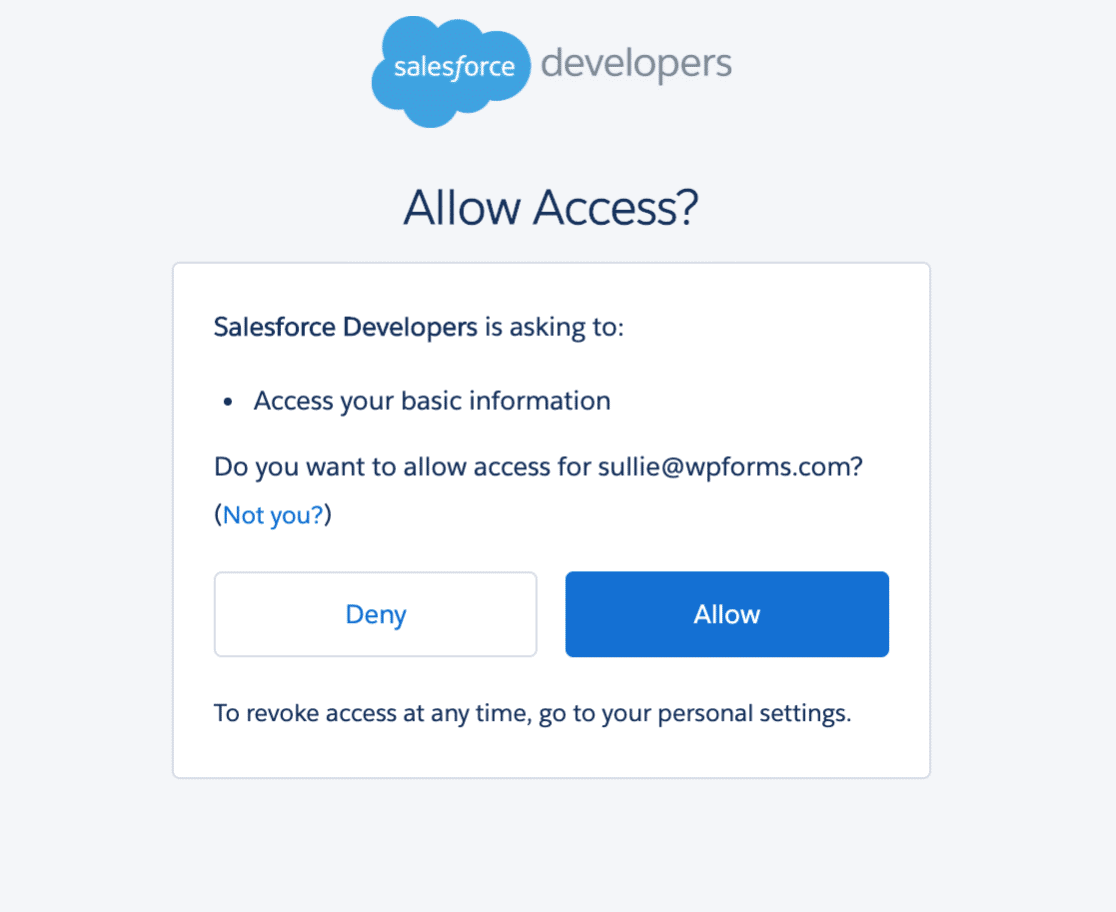
Click on the Allow button on the next screen.
If you have configured everything correctly, you will see a success message on the screen.
We are done!
Adding Salesforce To WordPress Forms
After completing the integration, we need to add it to our forms. We do not need to create a new form just for this. We can simply add the Salesforce addon to our existing forms.
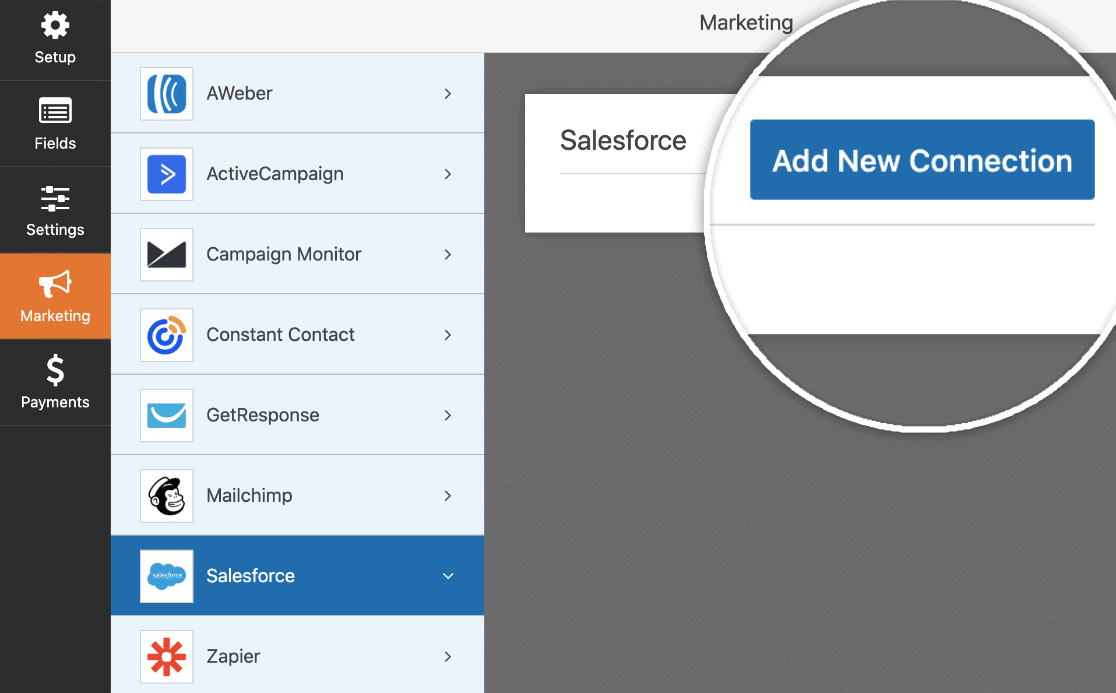
For doing it, go to the form builder, marketing section. You will see the Salesforce add-on there.
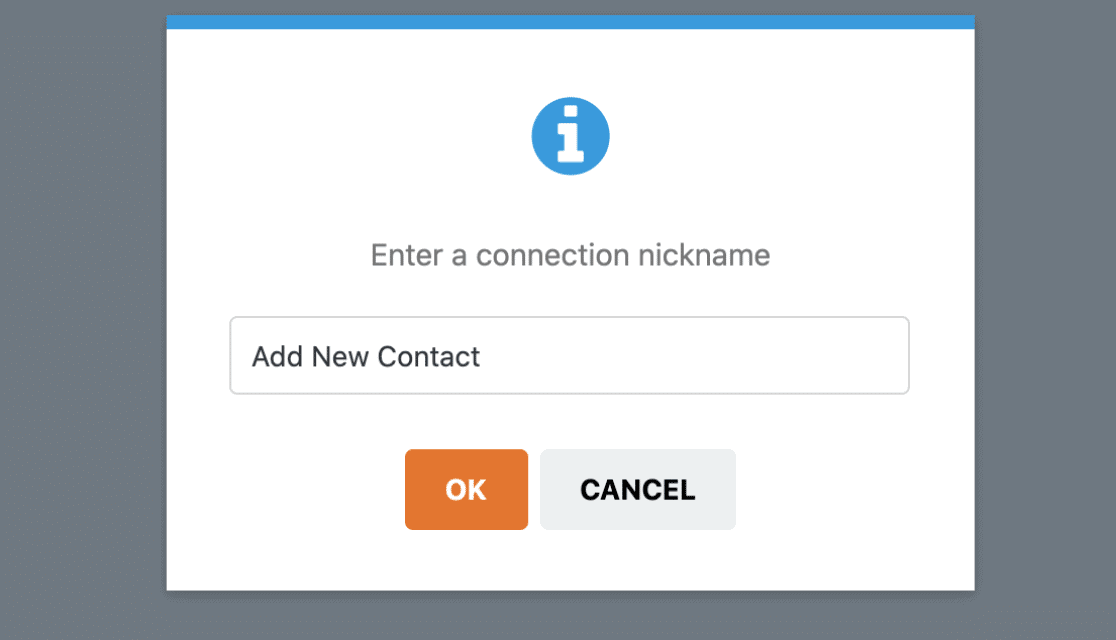
Click on the Add a New Connection button for adding new integration. You will need to name your integration now.
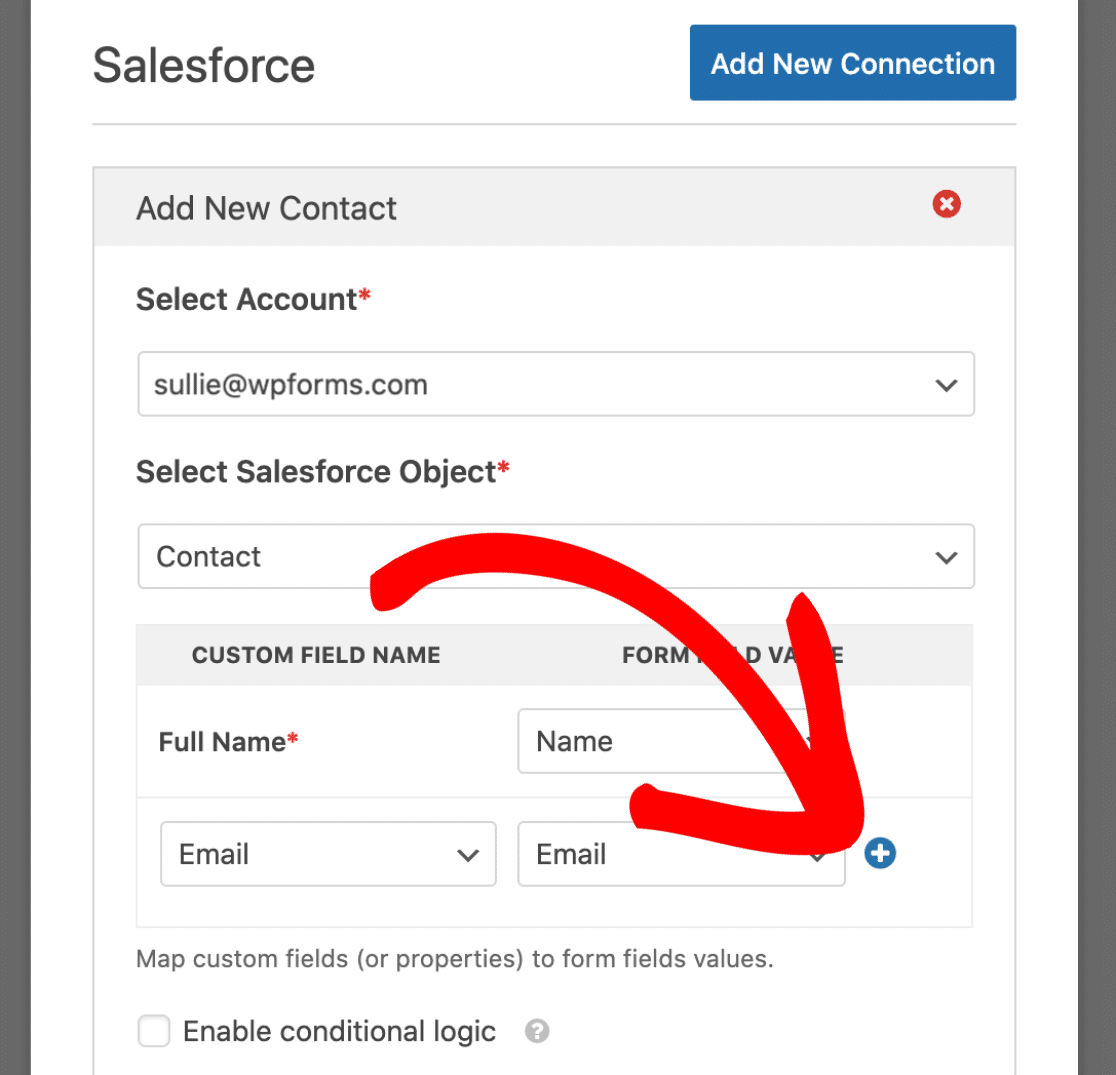
This is just for identification. From the dropdown, select your Salesforce account.
Also, pick a Salesforce object from the dropdown. This is the data we are going to send you to the Salesforce CRM. The plugin will show you all the available form fields on the page.
You can assign the form field name and form field value accordingly.
If you need to add more fields, simply click on the + button.
You can enable the Conditional Logic feature for making the integration more powerful. However, after assigning everything, save your form. You can test your form after that.
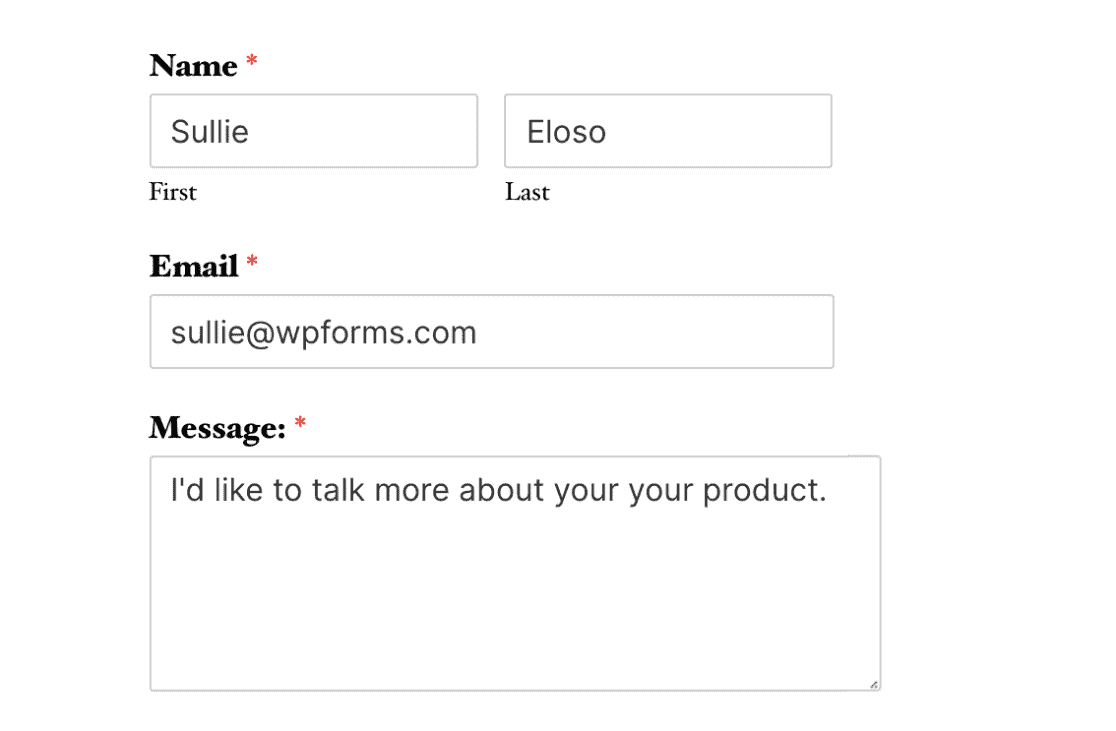
Feel free to send a test email through your form.
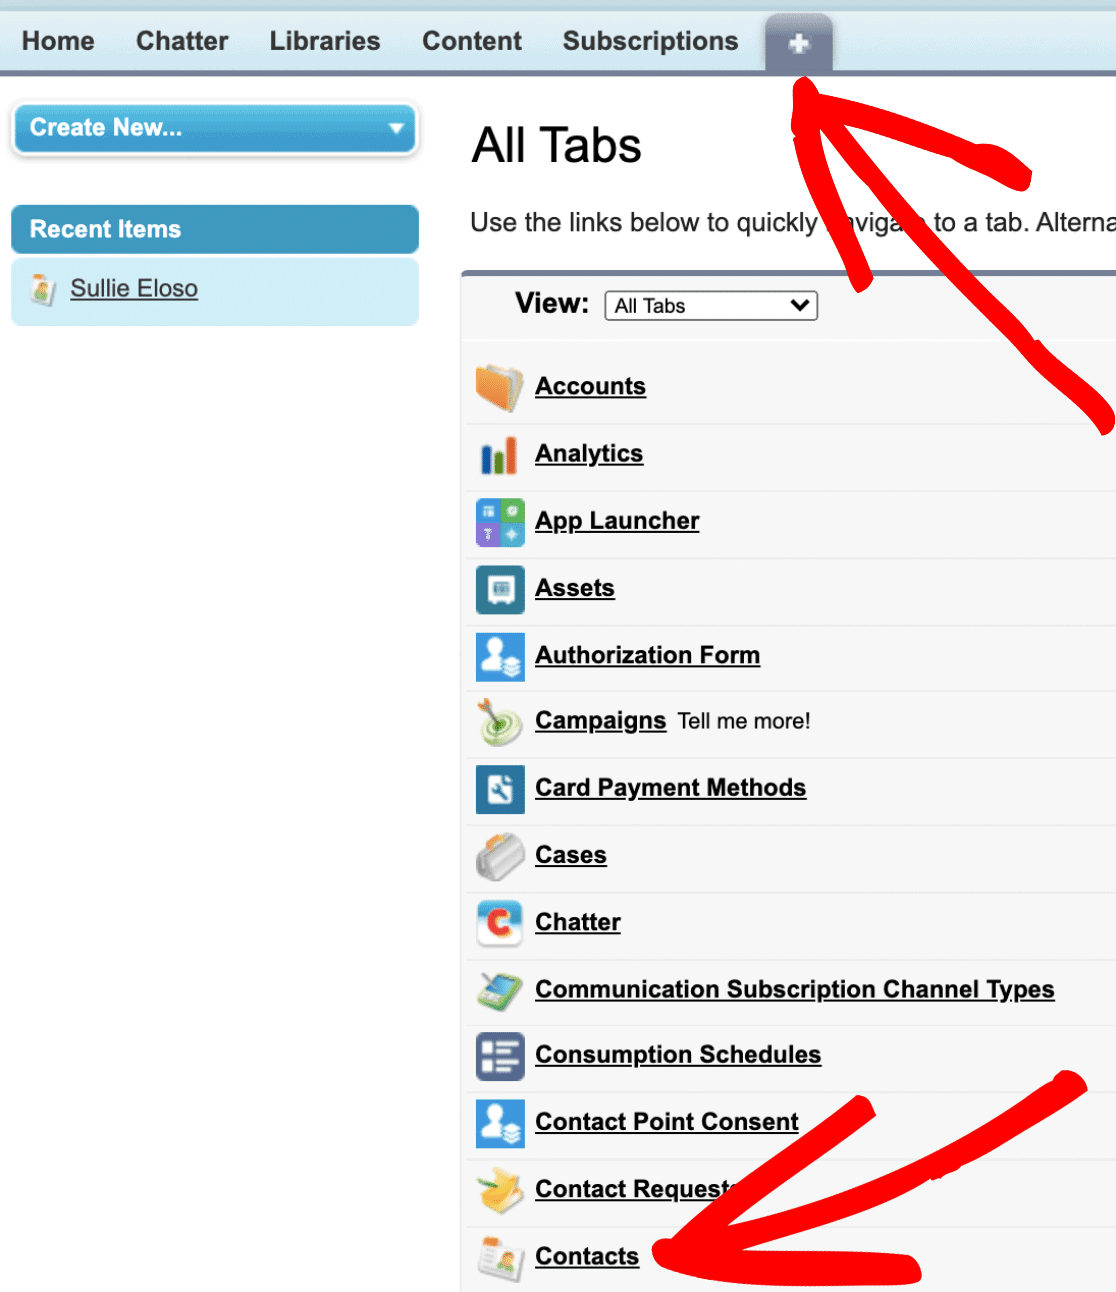
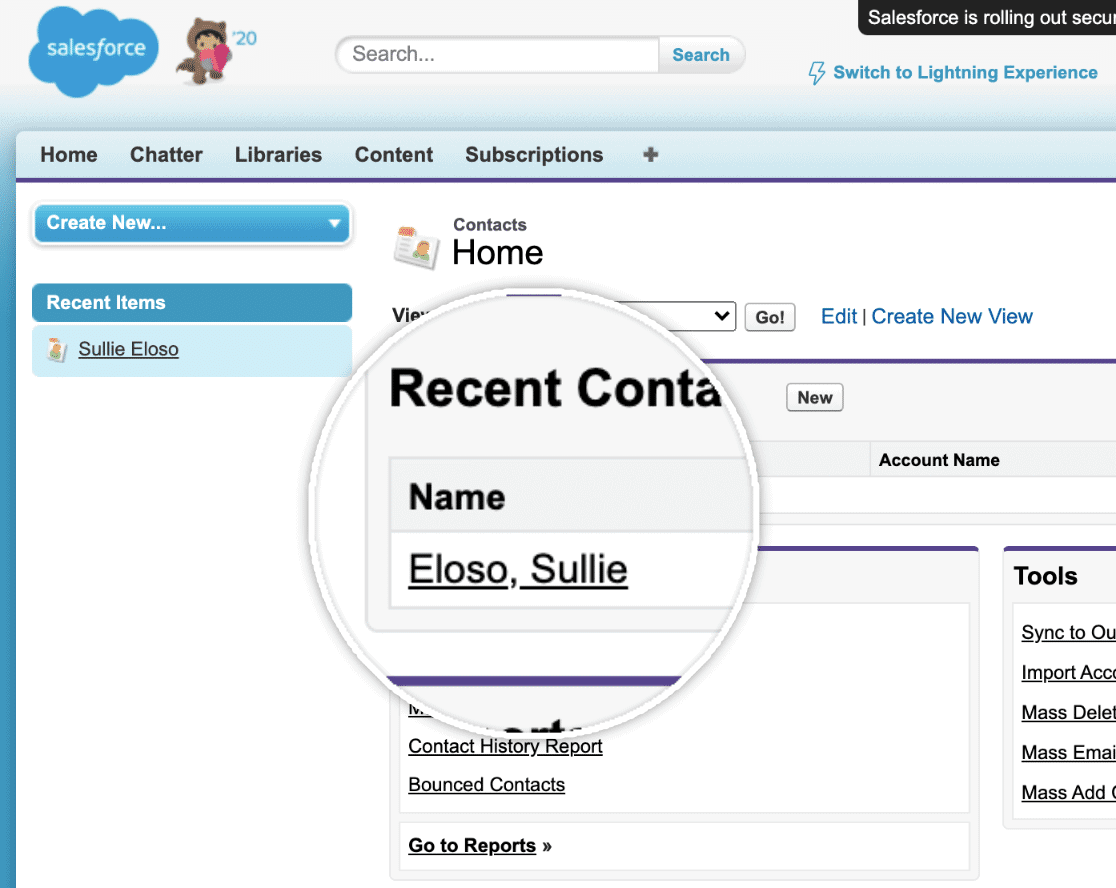
After that, you will need to go to the contacts section on your Salesforce account.
You can see it in the Recent section.
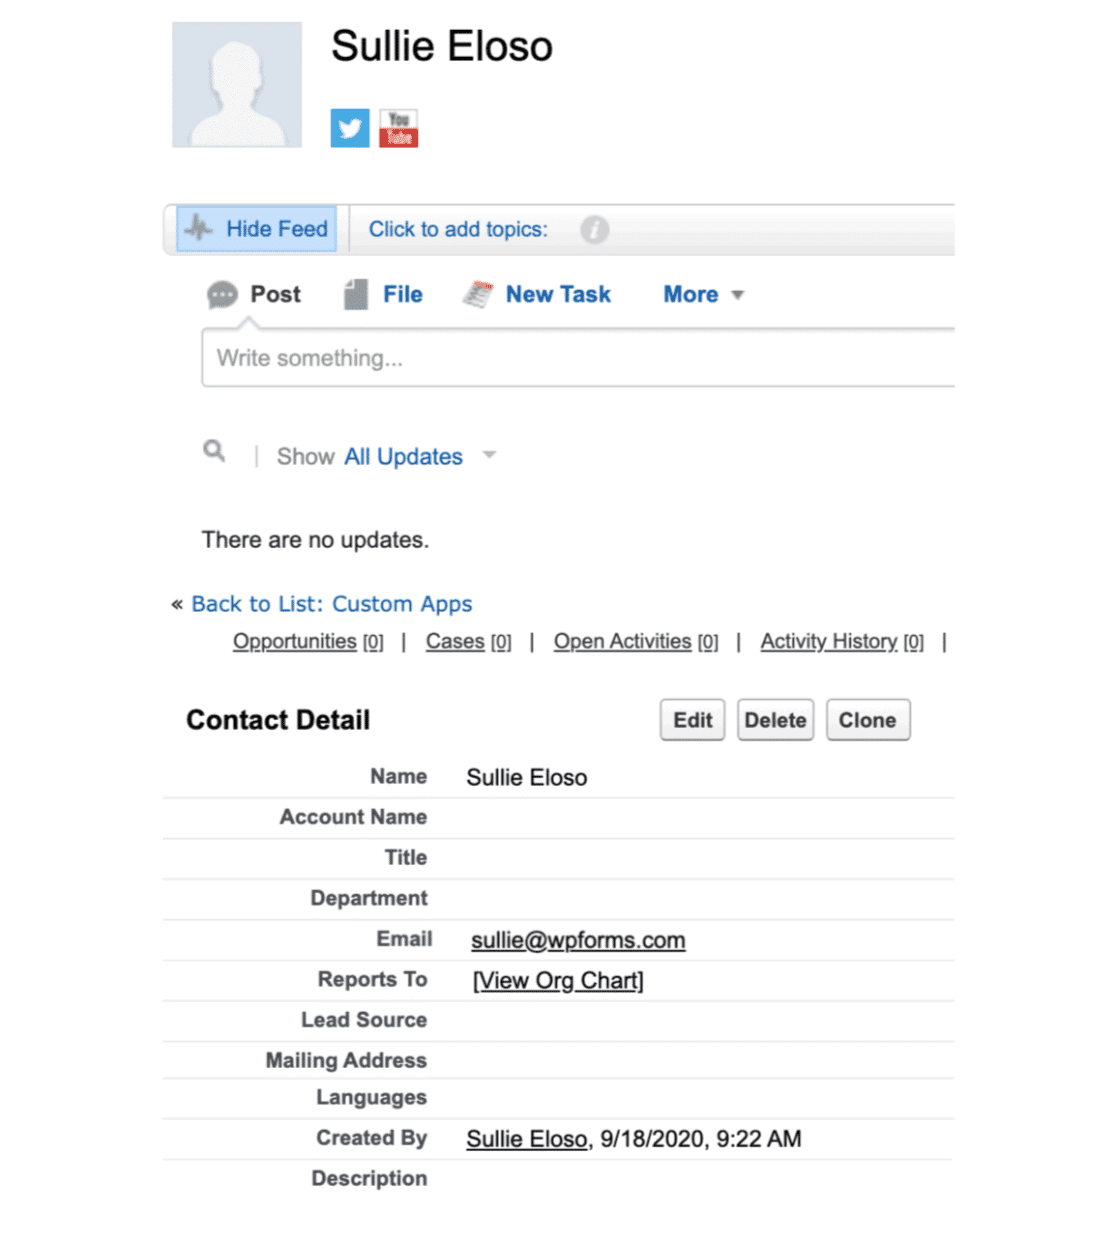
You can click on it and see the complete information.
That’s it!
You have successfully integrated WPForms with Salesforce. Automating this task will help you to simplify things, make your business better every day.
Get Started With WPForms
You can get the premium version of WPForms from below.
So this is how you can integrate WPForms with Salesforce. We hope you have enjoyed the article and found it useful. If you did, please consider sharing this article with your friends and fellow bloggers on social media. More awesome WordPress tutorials, reviews can be found on our blog.







Leave a Reply